How to Track My Bod Workouts on My Applewatch
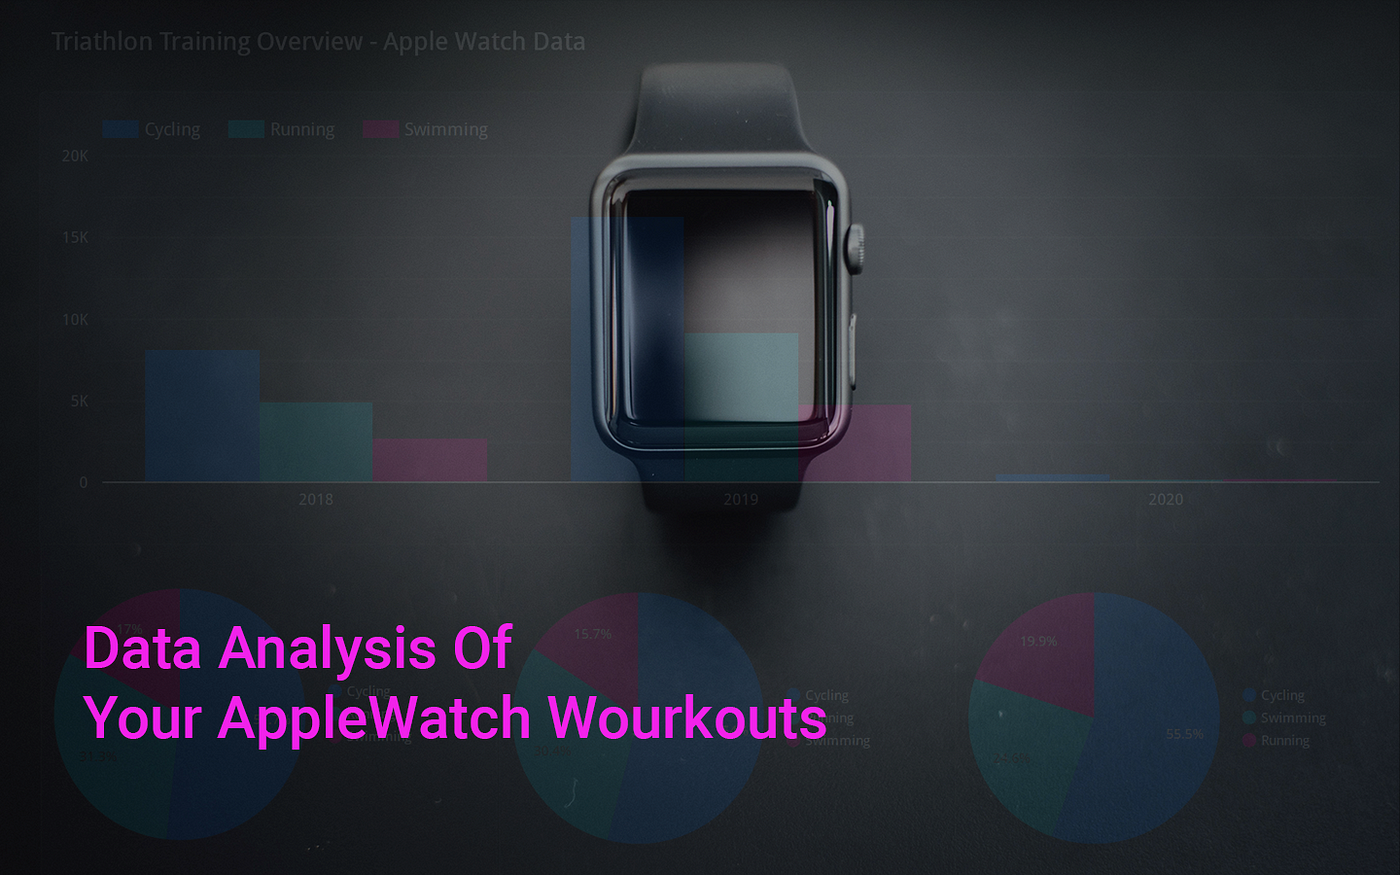
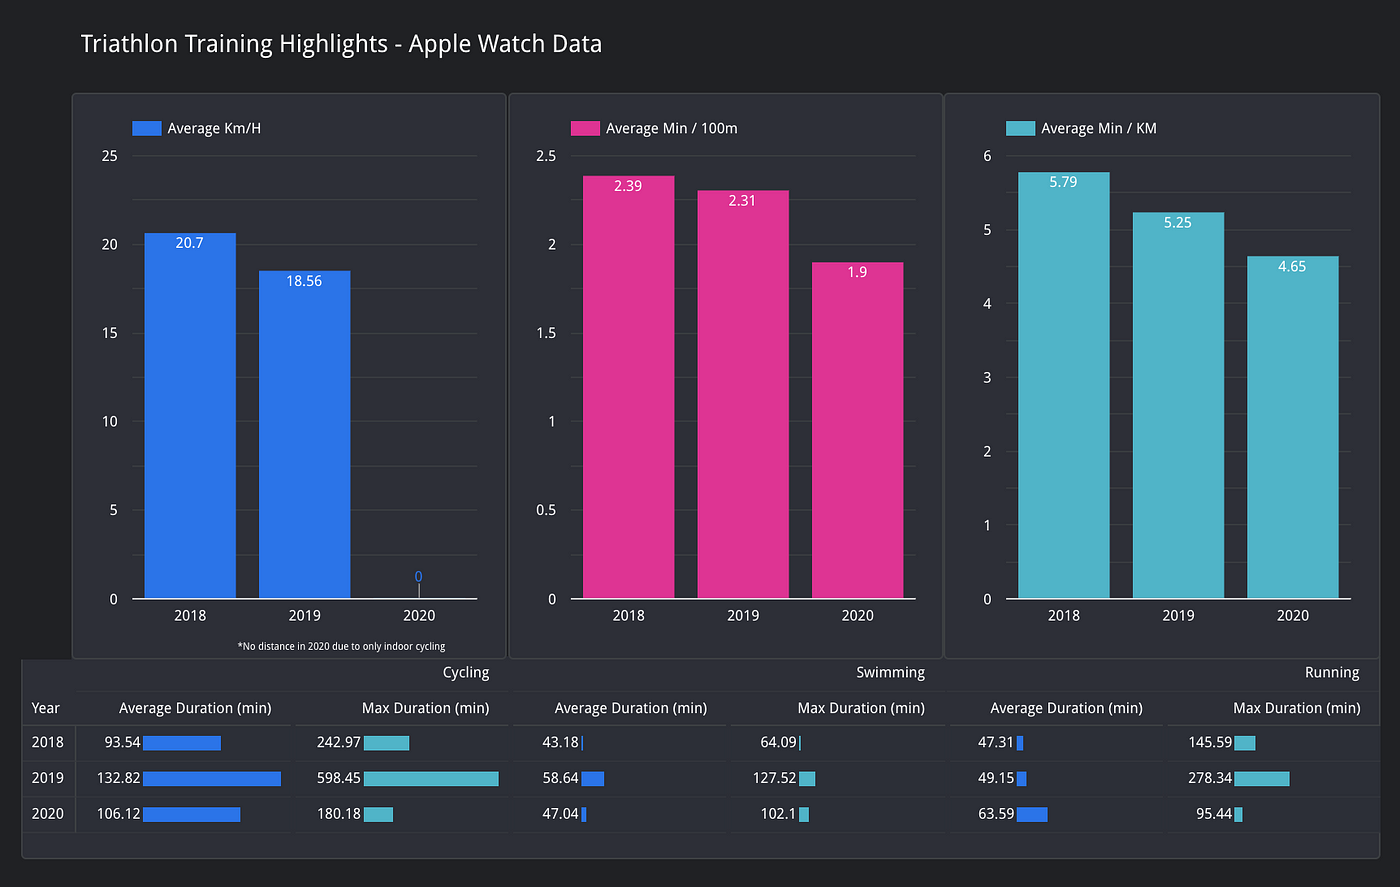
Data Analysis Of Your AppleWatch Workouts
![]()
Are you a sports and data geek tracking your workouts with the Apple Watch? Then it is probably time to learn more about your performance development over the last years. After reading this article you will know how to get deep insights about your workouts and sport patterns. And if this is not enough, it may be a nice first project to dive into data analysis: You will learn how to extract your data from your tracking device (In this case Apple watch), how to clean and transform the dataset and finally visualize it with Google Data Studio. Let's get started!
The article is split into three parts. First of all, the Apple Watch data from your iPhone needs to be exported. Second, the received XML file is read, transformed and cleaned with the help of the programming language Python. The outcome is a perfect CSV file which can be plugged in to Google Data Studio. How to do this will we explained in the third part.
Tools We Use
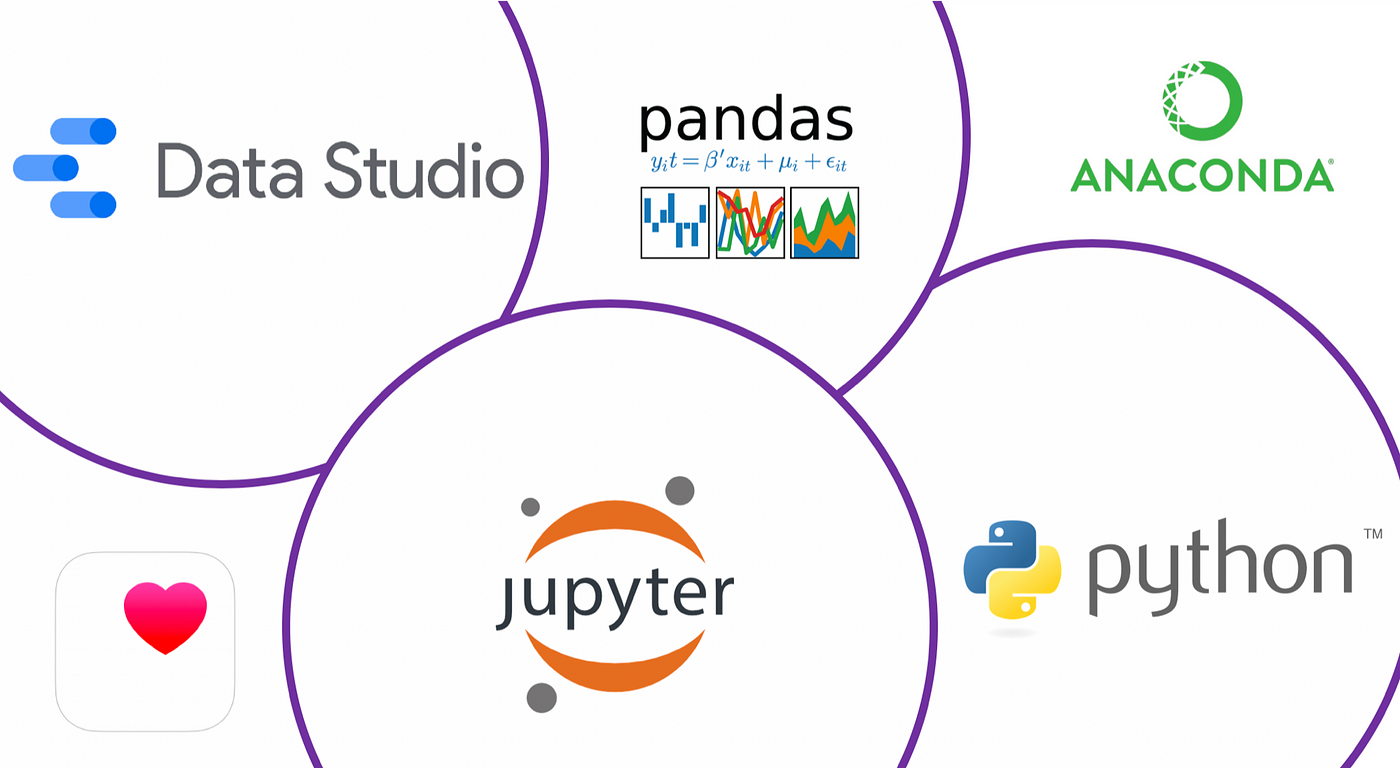
As already mentioned we are working with Python and its amazing open source libraries. First of all, we use Jupyter Notebook, an open-source application for live coding which allows us to tell a story and makes the code replicable. To get python up and running, Anaconda is recommended. How to set things up and running is described here. For data visualization, you could use any tool you want. Alternatives to Google Data Studio are Tableau, Grafana or any data visualization gadgets according to your preferences.
1. Export Data From Your Apple Device
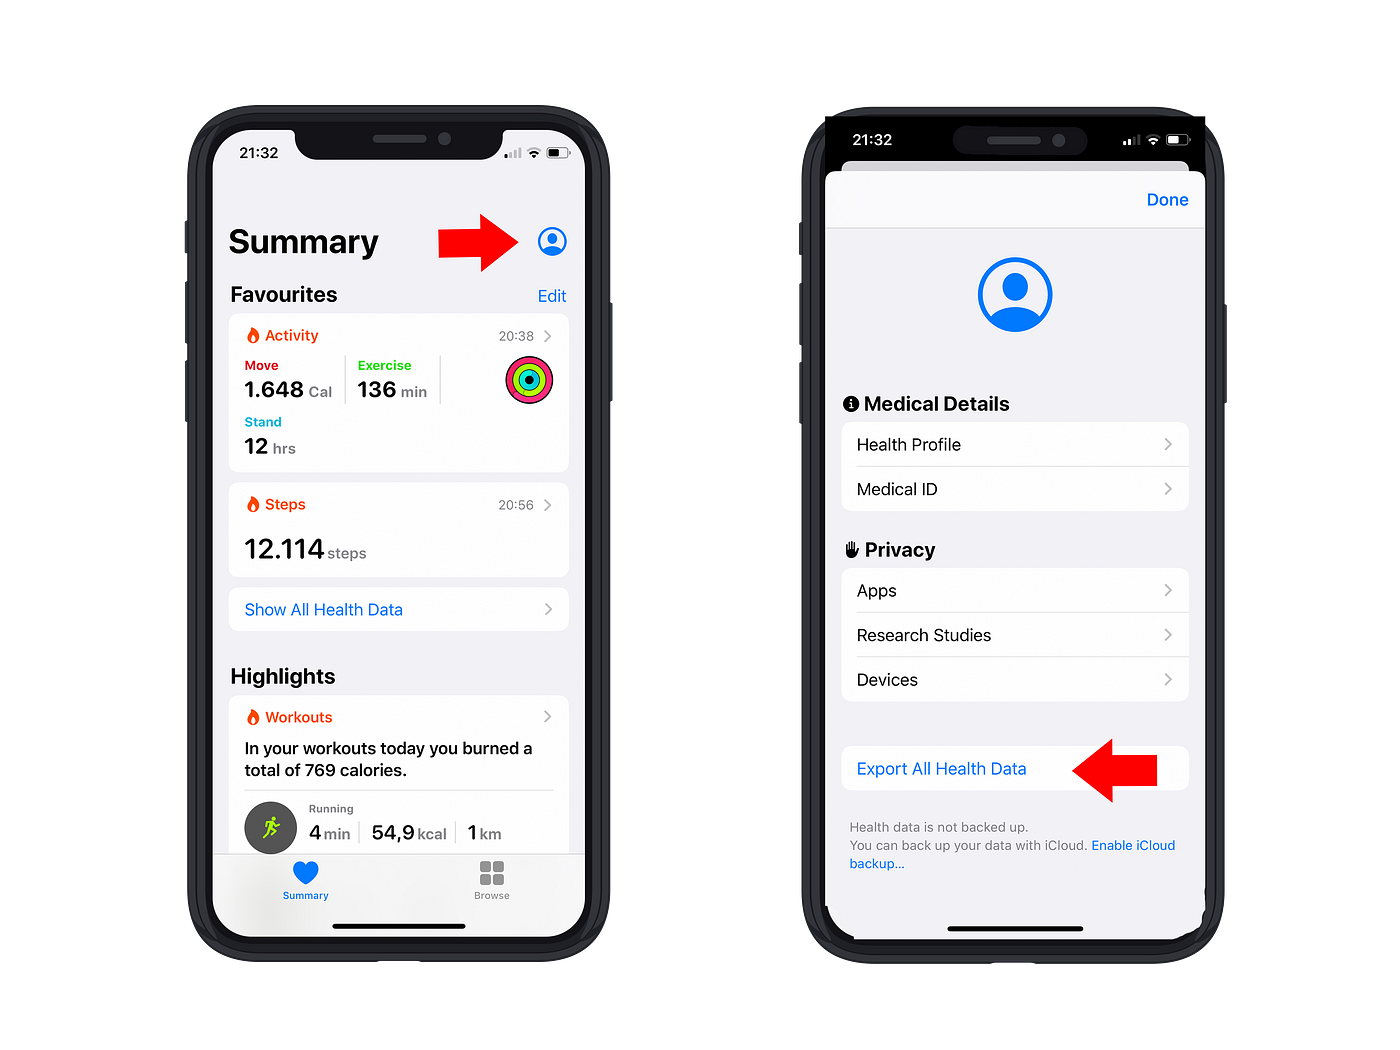
First of all, we need to know where to find all the data collected by your Apple Watch. Therefore open the Health app from your home screen. On the upper right, you can access your profile. Scroll to the bottom and export all the data you have. Don't worry, this may take a while.
What you will get is an XML file. XML stands for Extensible Markup Language which means your data is stored within a non-predefined structure and in pure text format. So if you want to have a peek at the content of the file, you can open it with your standard text editor. XML is widely used across the internet for data transfer. In the next step, we grab this file with python and massage the dataset.
2. Data Transformation & Cleaning With Python
After exporting the XML file with all your workouts it shit sit somewhere on your laptop right now. First thing we do is loading the file into a Jupyter Notebook (You should have Python and Jupyter Notebook already installed. If not give it a try with Anaconda, or have a look on how to setup your data science environment mit Docker.)
In order to read the XML file the package xmltodict is loaded and used to read our export. In this case, we save on the one hand all 'Record' data of our watch in 'records_list', and the actual workout data in 'workouts_list'. While we will only work with the workout data it is still useful to know that there is much more available and you can start working with it right away.
          #Reading the file and converting it as a dict.                    import pandas as pd
import xmltodict          input_path = '/Users/apple_health_export/export.xml'
with open(input_path, 'r') as xml_file:
            input_data = xmltodict.parse(xml_file.read())          #Records list for general health data & imported as Pandas Data Frame
records_list = input_data['HealthData']['Record']
df_records = pd.DataFrame(records_list)          #Workout list for workout data
workouts_list = input_data['HealthData']['Workout']
df_workouts = pd.DataFrame(workouts_list)
Next, some of the columns have to be converted to a different format. On the one hand duration, distance and energy burned shall be numeric, and a date format is applied to the dates
          #Convert selected columns to numeric so we can do calcuations
# convert just columns "..." and "..."
df_workouts[["@duration", "@totalDistance", "@totalEnergyBurned"]] = df_workouts[["@duration", "@totalDistance", "@totalEnergyBurned"]].apply(pd.to_numeric)
df_workouts.dtypes          #convert dates to actual datetime
format = '%Y-%m-%d %H:%M:%S %z'          df_workouts['@creationDate'] = pd.to_datetime(df_workouts['@creationDate'],format=format)          df_workouts['@startDate'] = pd.to_datetime(df_workouts['@startDate'], format=format)          df_workouts['@endDate'] = pd.to_datetime(df_workouts['@endDate'],format=format)          df_workouts.dtypes
For our workout analysis, we do not need all the columns. For swimming for example we have a split down to the 100m sets in the last columns. It can be useful if you want to go into detail, but for our purpose, we only choose the first 12 columns and only keep the workout activity types Swimming, Running and Cycling.
#drop unnecessary columns (all rows and column 1 to 12)
df_workouts = df_workouts.iloc[:,0:12]
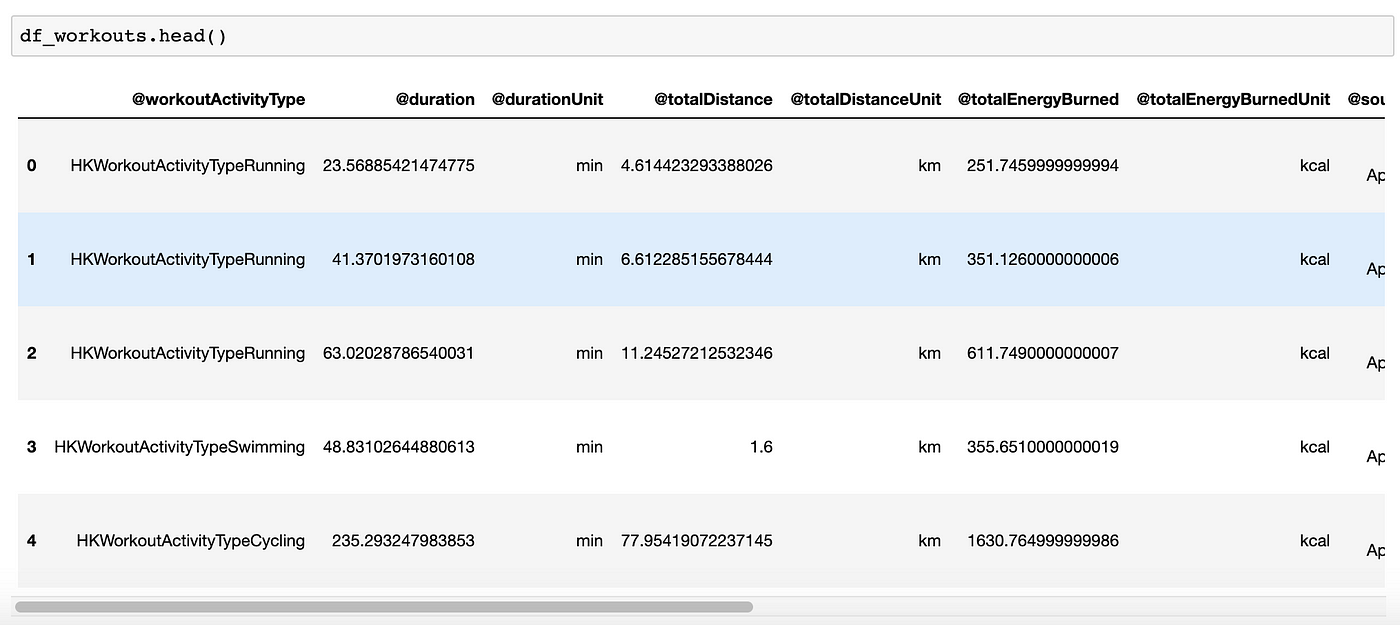
df_workouts.head() #Remove HKWorkoutActivityTypeWalking and HKWorkoutActivityTypeSnowSports
df_workouts=df_workouts[df_workouts['@workoutActivityType'] != 'HKWorkoutActivityTypeWalking']
df_workouts=df_workouts[df_workouts['@workoutActivityType'] != 'HKWorkoutActivityTypeSnowSports']
As the workout names are very long the original workout name such as "HKWorkoutActivityTypeCycling" is replaced with simply "Cycling". This is done for running and swimming too.
          #Rename Activity Types to Running, Cycling and Swimming
df_workouts["@workoutActivityType"]= df_workouts["@workoutActivityType"].replace("HKWorkoutActivityTypeCycling", "Cycling")
df_workouts["@workoutActivityType"]= df_workouts["@workoutActivityType"].replace("HKWorkoutActivityTypeRunning", "Running")
df_workouts["@workoutActivityType"]= df_workouts["@workoutActivityType"].replace("HKWorkoutActivityTypeSwimming", "Swimming")          df_workouts.head(15)
Last but not least check the head of the dataframe. If it looks the way you want it to look, let's do a CSV export and get our final analytical dataset ready to plug in to Google Data Studio.
#save as csv (Don't forget to add '.csv' at the end of the path)finalADS = df_workouts.to_csv(r'/Users/finalADS.csv', header=True) 3. Creating A Dashboard With Google Data Studio
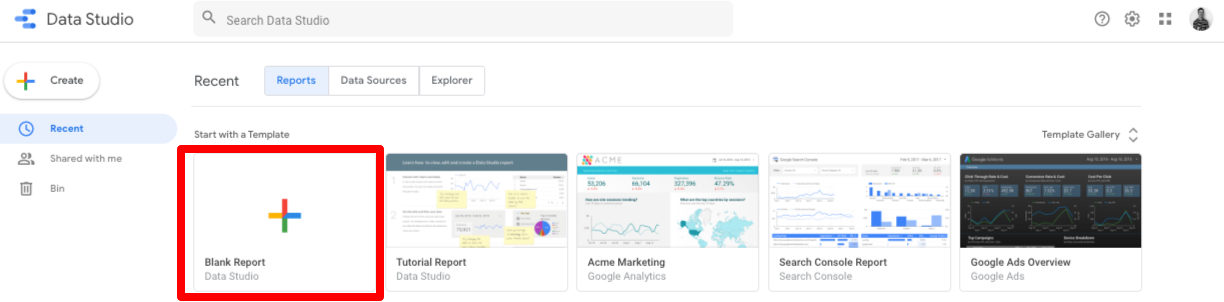
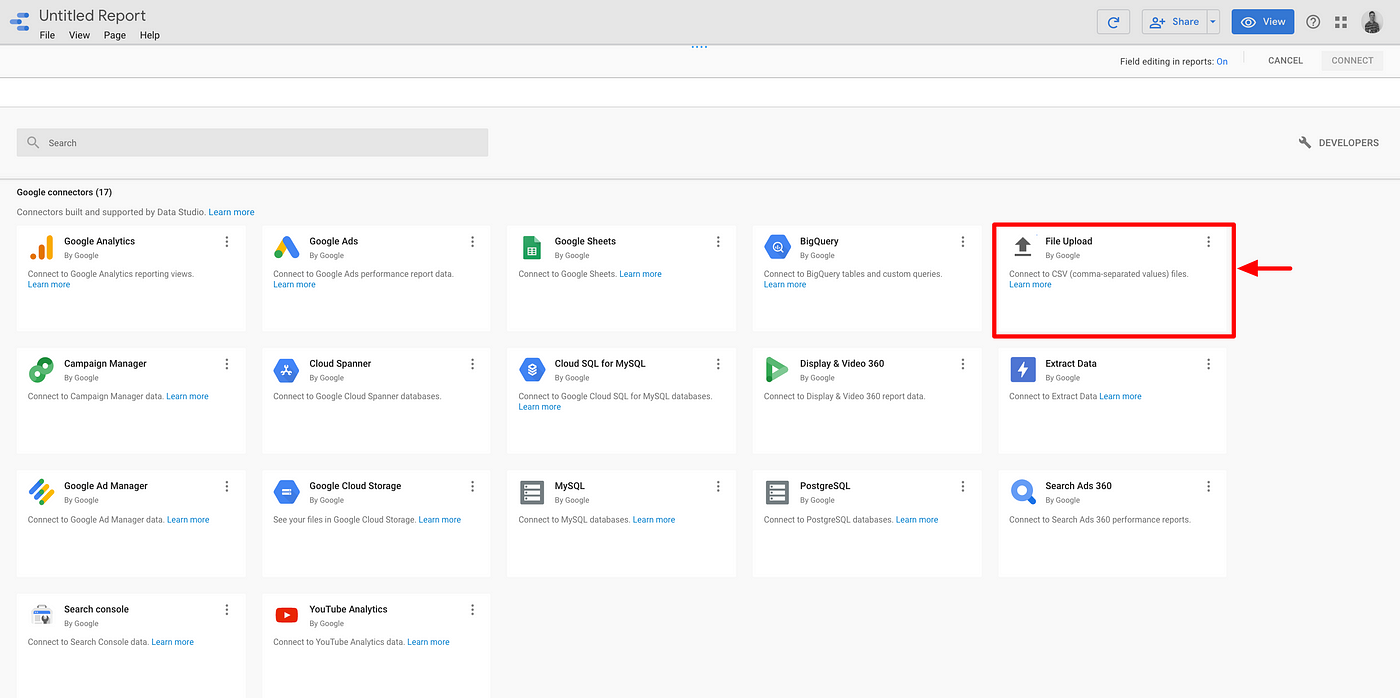
Last but not least we are visualizing our exported CSV dataset to explore our workout data. Google Data Studio is the tool of choice as it is freely available for everybody and offers a quick way to visualize simple data. If you already have a Google account visit https://datastudio.google.com/ and you are good to go. Google Data Studio offers some sample reports, but in this case, we start from scratch, go with "Blank Report" and add our CSV as data source.
Google Data Studio will confirm the successful upload of your CSV. In my case, the first column was not named 'ID' and had the be labeled retrospectively. After that, you can get started and create the charts you want. Not every chart will be explained in the following, but the three basic steps of how to create a chart in general in Google Data Studio.
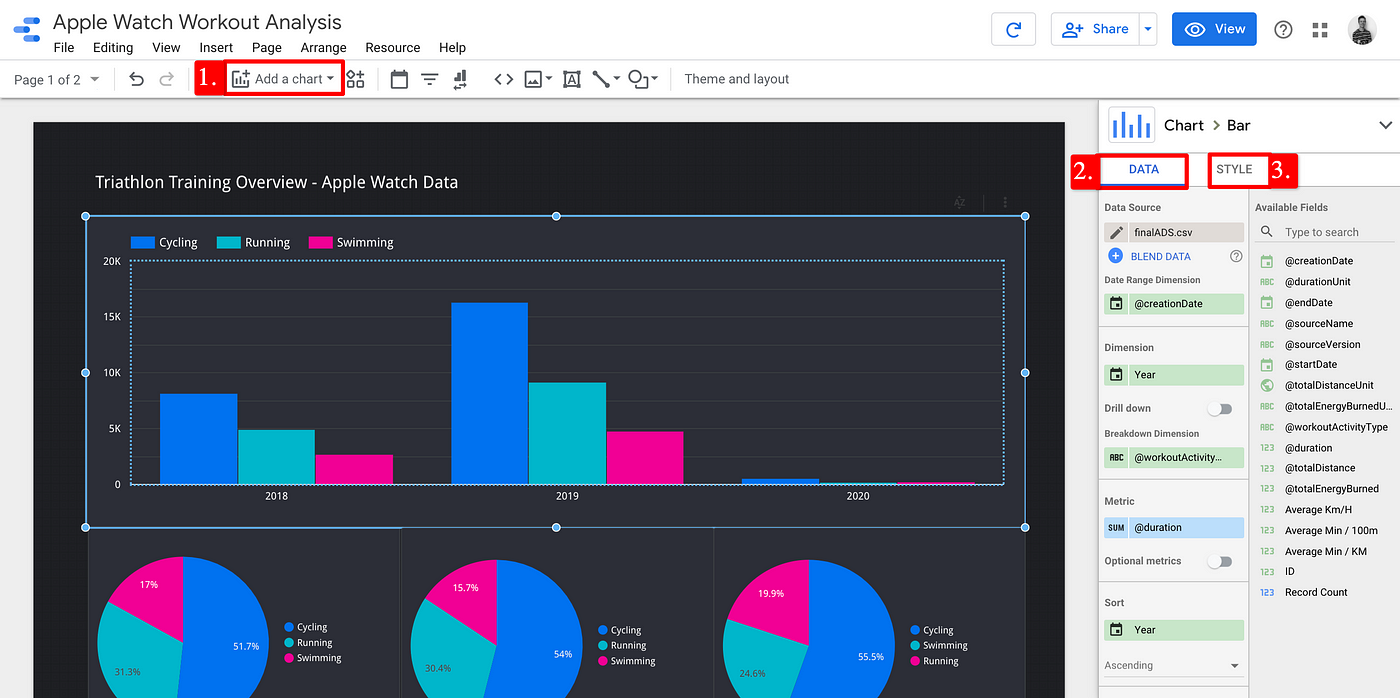
- Add a new chart by clicking on the outlined button on your top navigation bar.
- After choosing the required chart type, the data to be displayed is chosen next. First, select our "finalADS.csv" as Data Source. Second the "Date Range Dimensions" should be defined. In this case, we want to compare the years and how our workout behaviour developed. Third, our "Breakdown Dimension" is chosen as "@workoutActivityType". This allows us to break down our workouts in Swim, Bike and Run
- Last but not least we can style the chart. for all the different charts, the same colour is used for the same workout activity type. That way we can easily allocate the workouts to the respective charts.
Conclusion
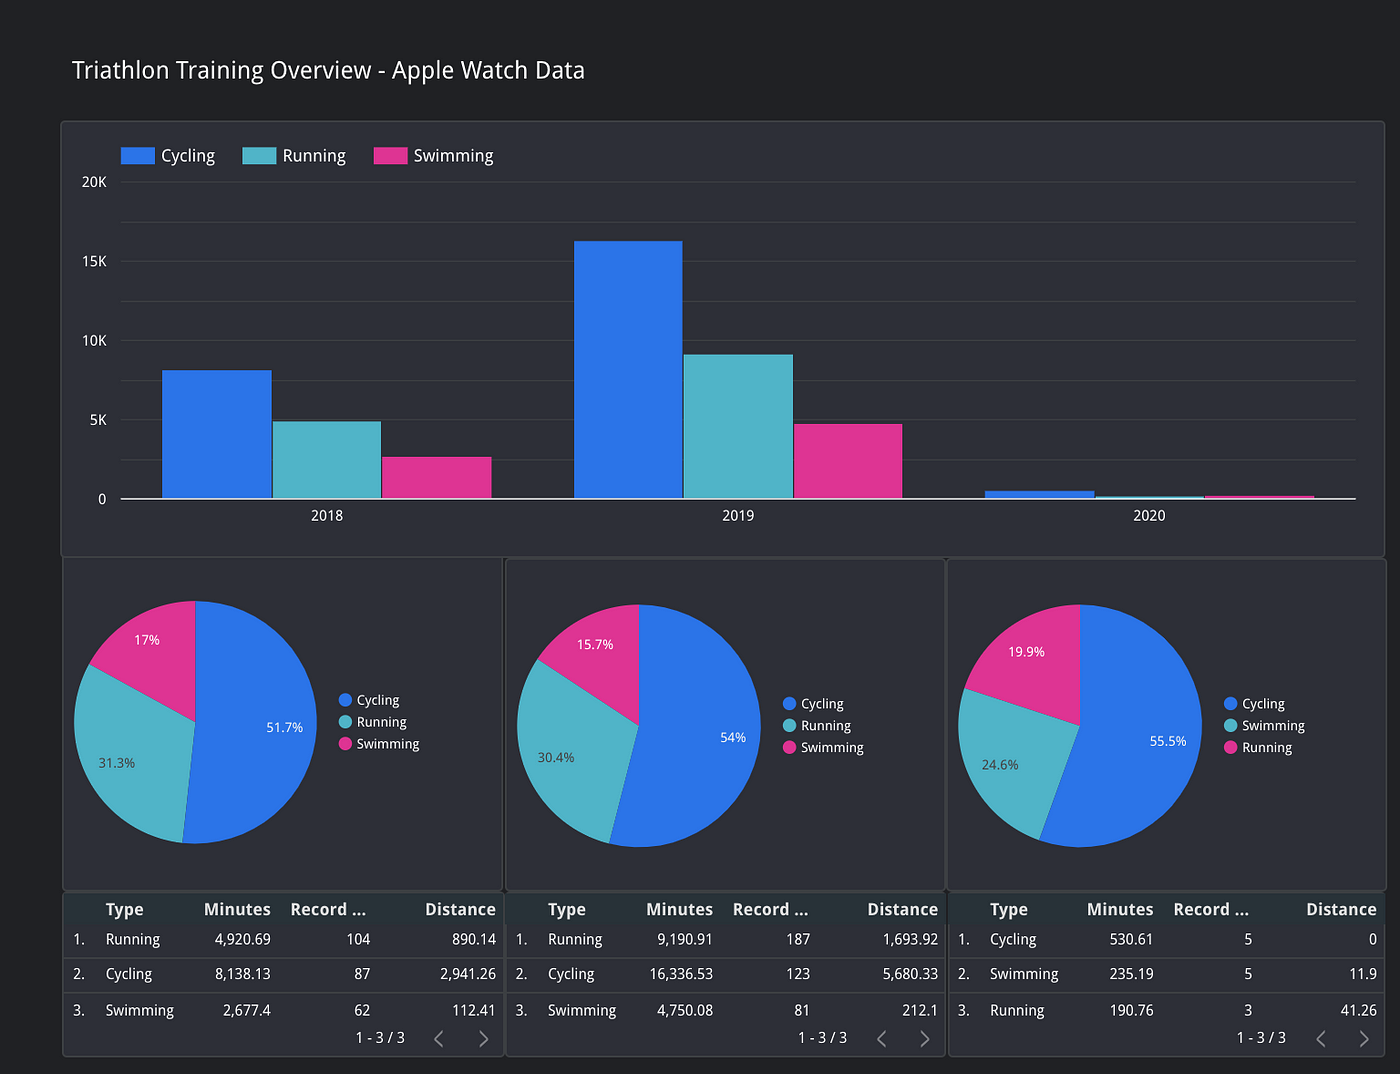
From a sportive point of view, it is amazing to see how the training volume almost doubled from 2018 to 2019, and on the other hand, the speed increased over the years. Seems like sportive things are going in the right direction, but you see that the bigger focus of this project was on working with the dataset created by an Apple Watch Device.
While it was very easy to extract the dataset, it took some time the get used to the XML file. But I'll promise if you once get the hang of it, you'll love it. From then on it was a very typical process of data analysis with parts of cleaning and transforming. Last but not least I can only recommend data visualization with Google Data Studio for projects not very complex. It is free, it has most of the options and is easily shareable. For other tools in this range, you definitely have to pay the price.
***************************************************************
If you have any questions or need some support with your data analysis feel free to connect via LinkedIn, Instagram or anywhere else.
***************************************************************
Articles you may enjoy reading as well:
Setup Your Data Environment With Docker
Eliminating Churn is Growth Hacking 2.0
Misleading with Data & Statistics
How to Track My Bod Workouts on My Applewatch
Source: https://towardsdatascience.com/data-analysis-of-your-applewatch-workouts-672fe0366e7c